Simulating Substances Application User's Manual
Simulating Substances Application User’s Manual
In this manual we explain how to install the application into your androif device and how to use it.
Installation
APK Files
An APK file is the file format used for installing software on the Android operating system. This is the file used to install the Simulating Substances application.
Previous Steps
Activate Developer mode
As there are different android devices, it’s recommended to search in Internet how to activate this service on your device. Generally you must navigate in your phone to the “Build number” portion of the settings and tap on the section 7 times. After two taps, a small pop up notification should appear saying “you are now X steps away from being a developer” with a number that counts down with every additional tap. After the 7th tap, the Developer options will be unlocked and available.
Allow third-part apps
Before you can install the application on your phone you will need to make sure that third-party apps are allowed on your device. Go to Menu > Settings > Security > and check Unknown Sources to allow your phone to install apps from sources other than the Google Play Store. Again maybe you will have to search in Internet how to do this in your device.
Installation
After obtaining the SimulatingSubstances.apk file, you just have to find it on your phone, tap it, and then hit Install. And you’re done.
User’s Manual
Graphical User Interface Overview
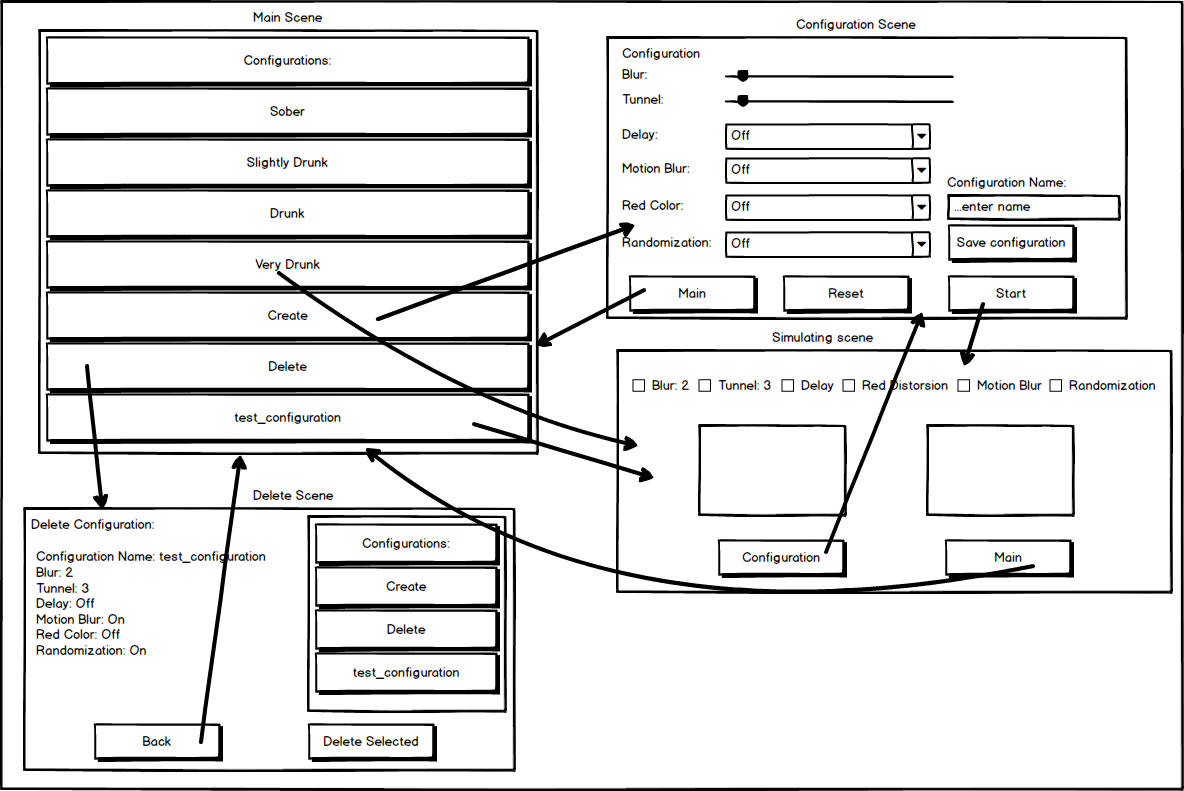
The image below provides a better understanding of the navigation in the Simulating Substances application. The entry point to the application is the Main scene:
Start with a default configuration
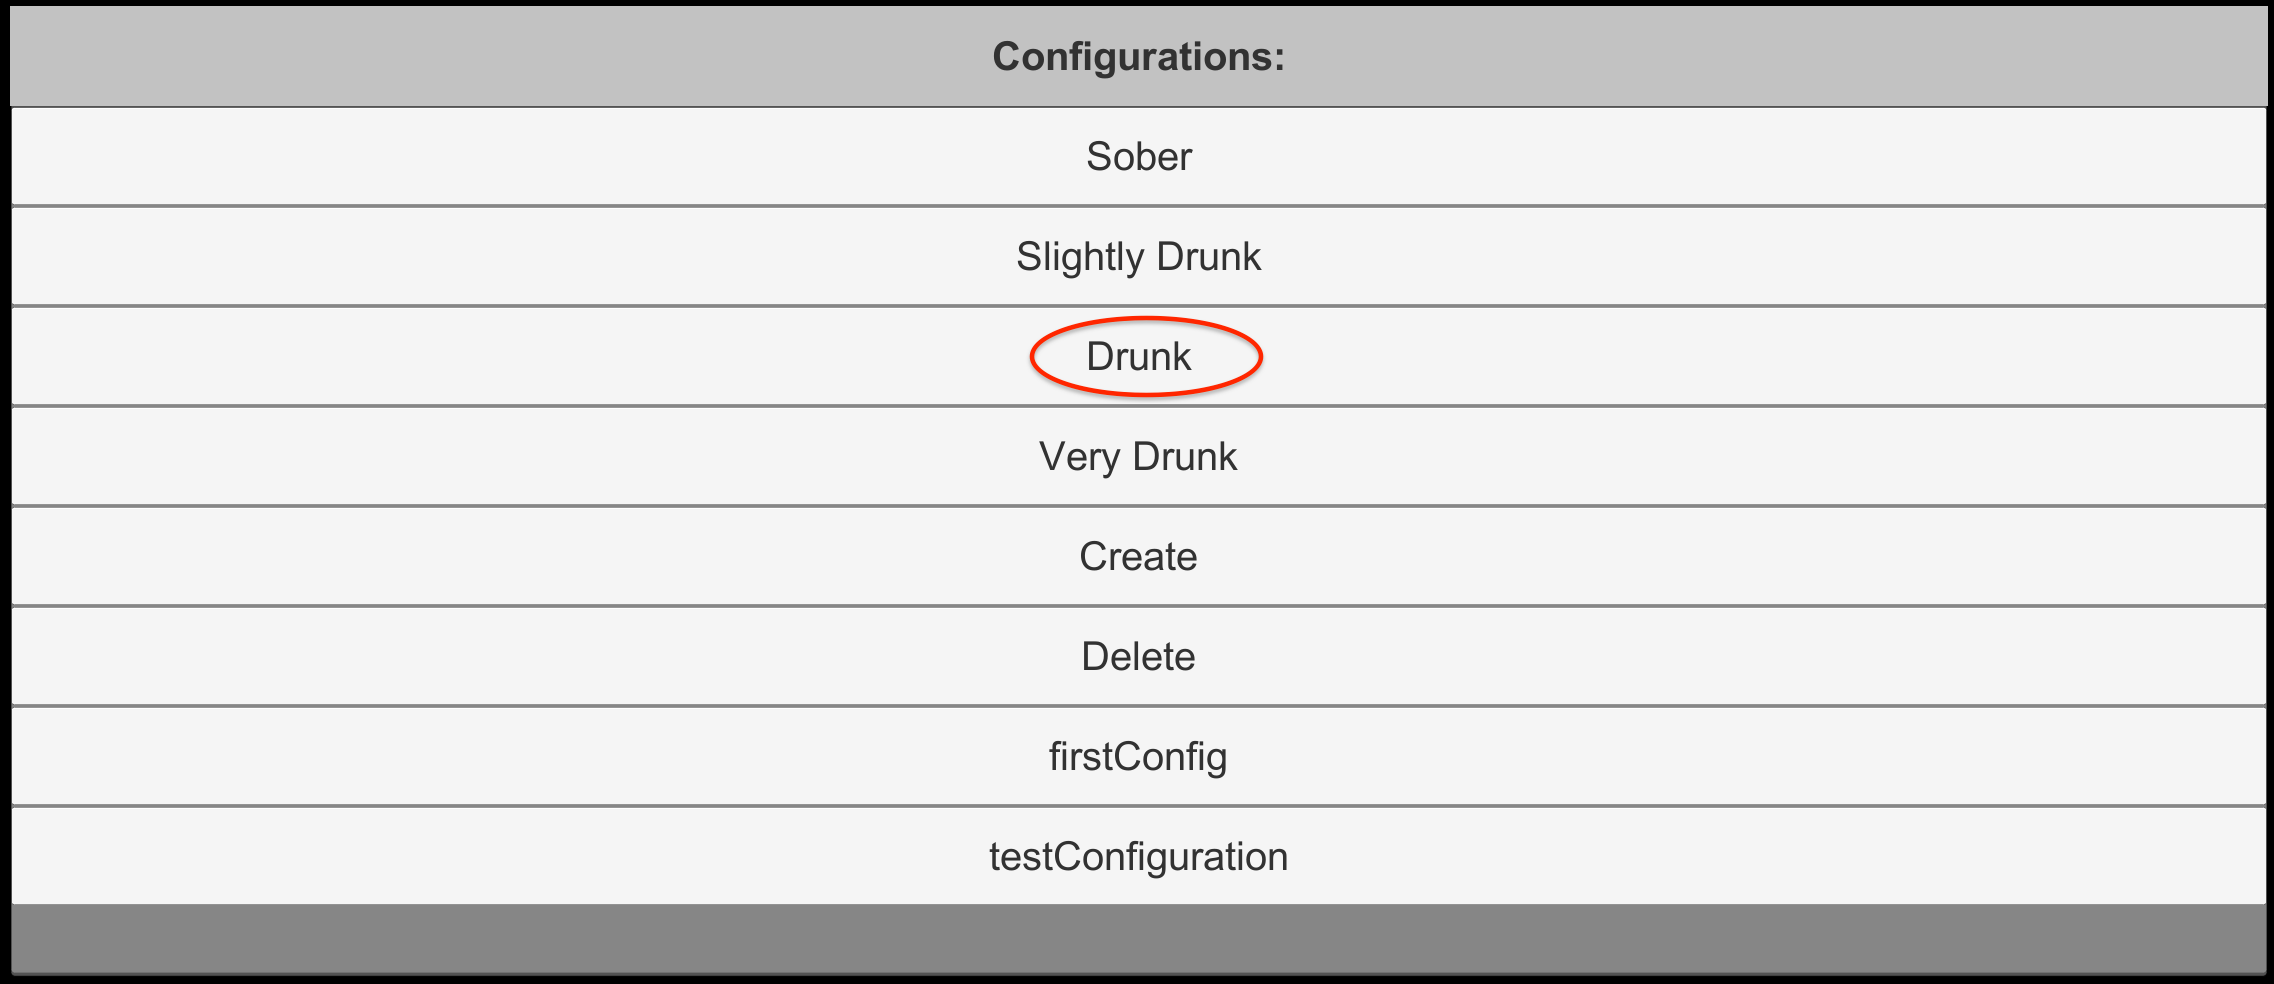
The application has four default configurations with different grades of alcohol: Sober, Slightly Drunk, Drunk and Very Drunk.
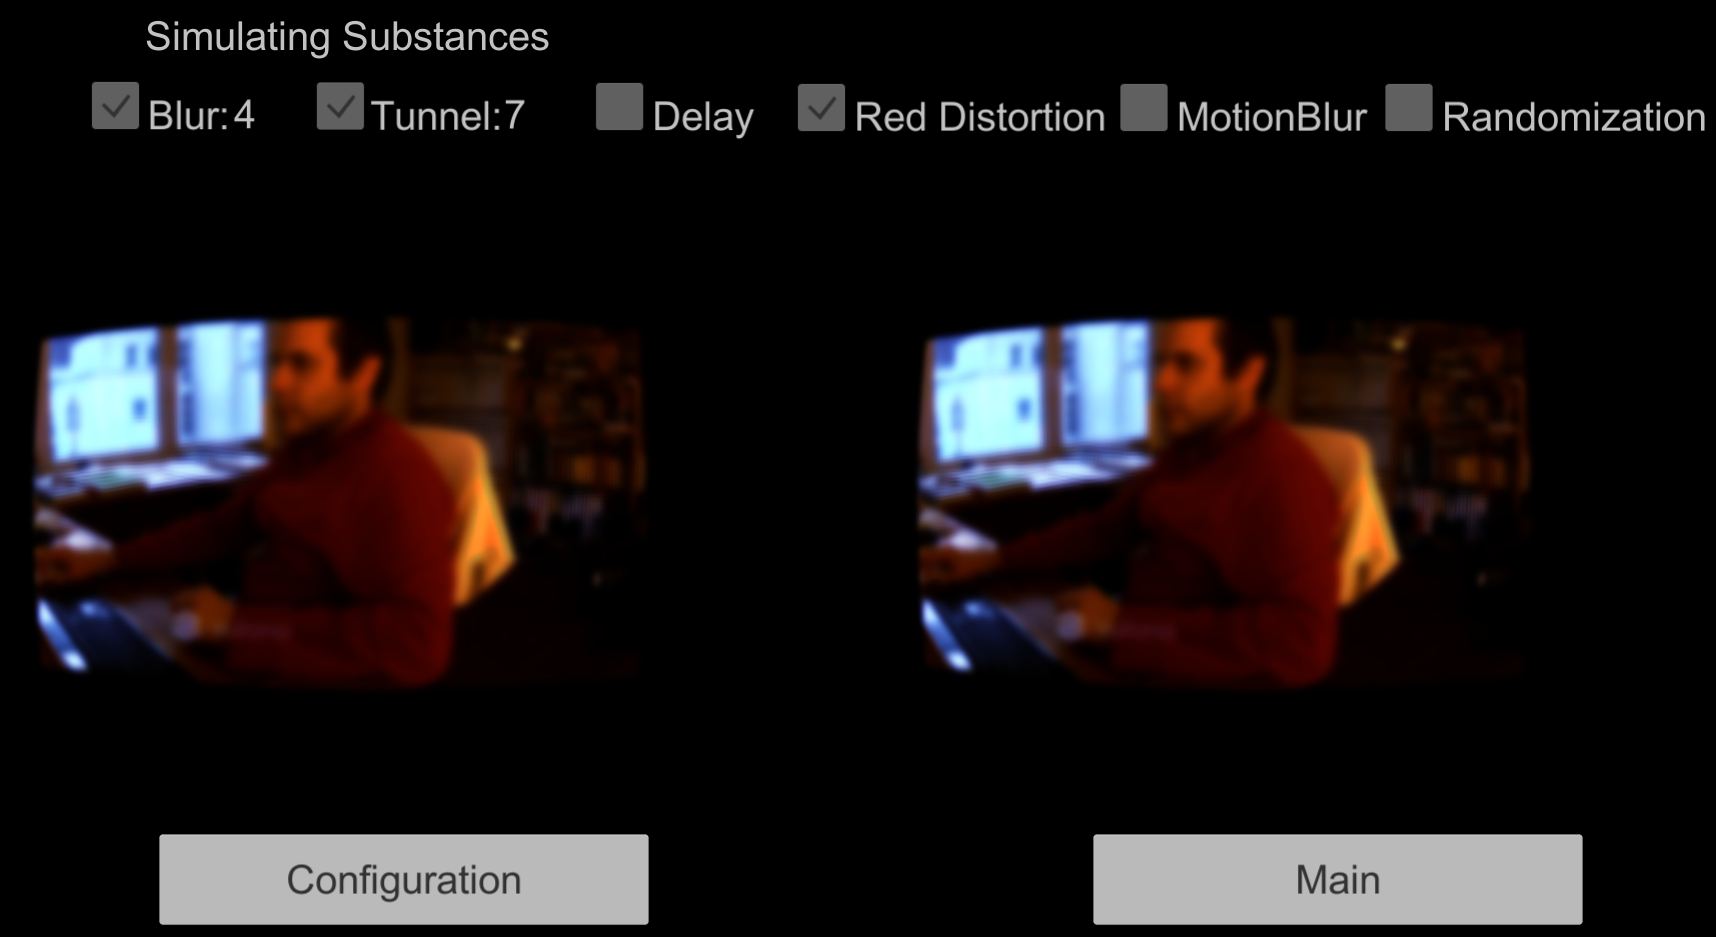
After starting the application, the Main scene is loaded. Select a default configuration from the list and double-click on it. The selected configuration will be loaded andthe Simulating Scene starts immediately. Put your glasses on and enjoy.
| Main Scene | Simulating Scene |
|---|---|
 |
 |
Create a custom configuration
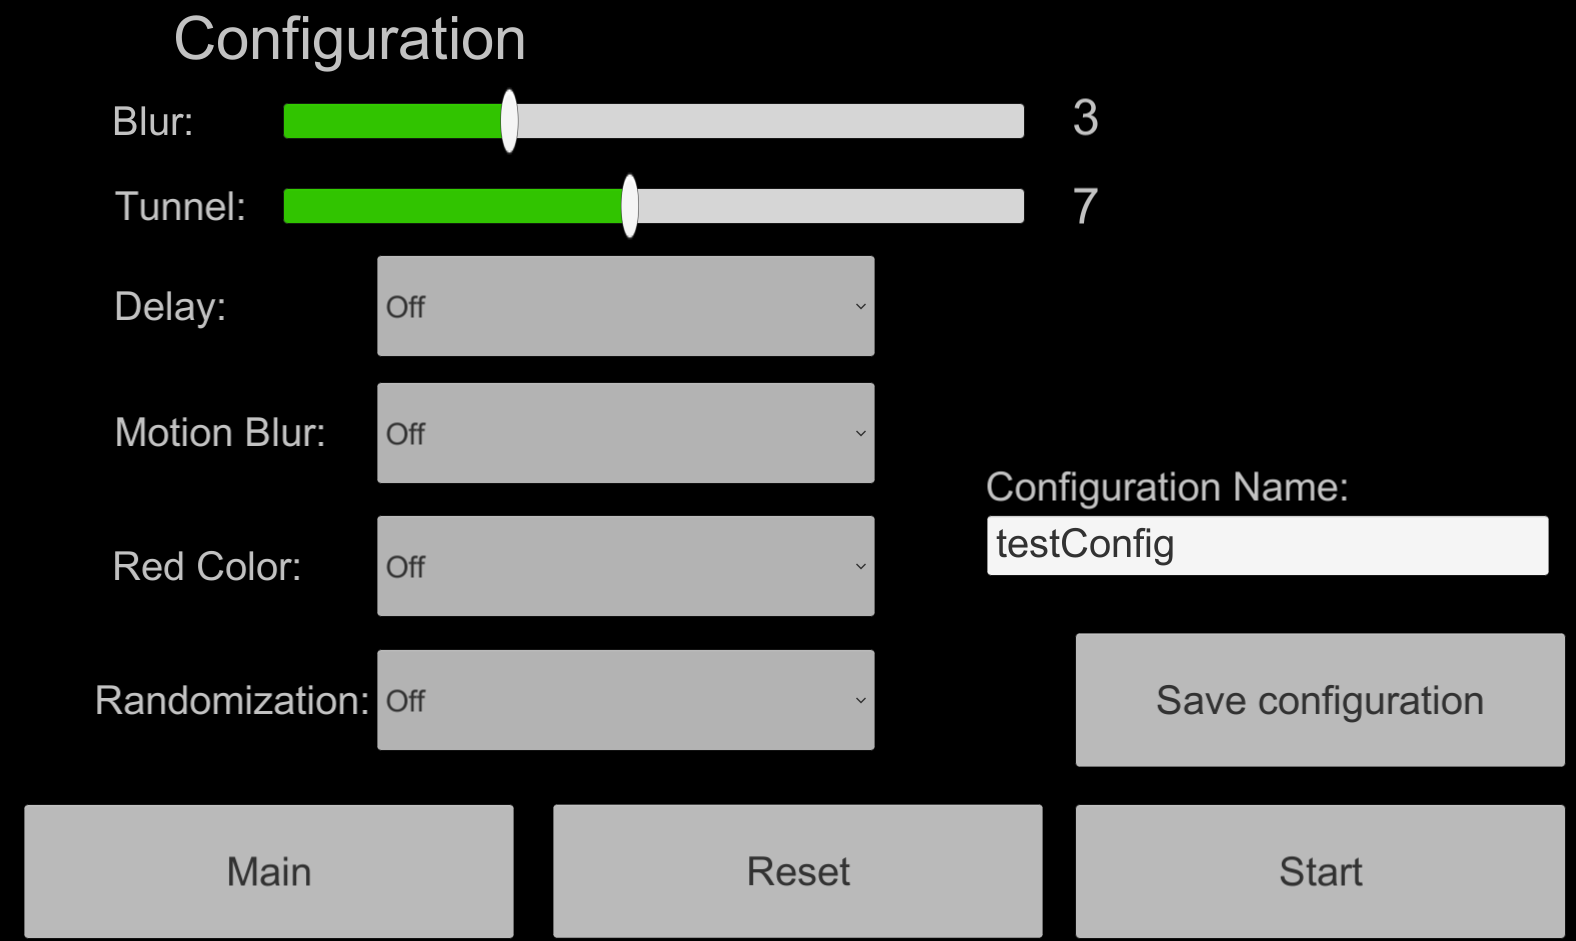
In the Main scene double-clickon the Create item. The Configuration scene loads. Choose the Blur and Tunnel View values by sliding the slider to the left or to the right. Activate or deactivate the Delay, Motion Blur, Red Color Distortion or Randomization effects just by selecting“On” or “Off” in the corresponding dropdowns. Once finished, hit the Start button and the simulation will start. If needed it’s possible to reset all the values to 0 or “Off” by pressing the Reset button.
| Configuration Scene |
|---|
 |
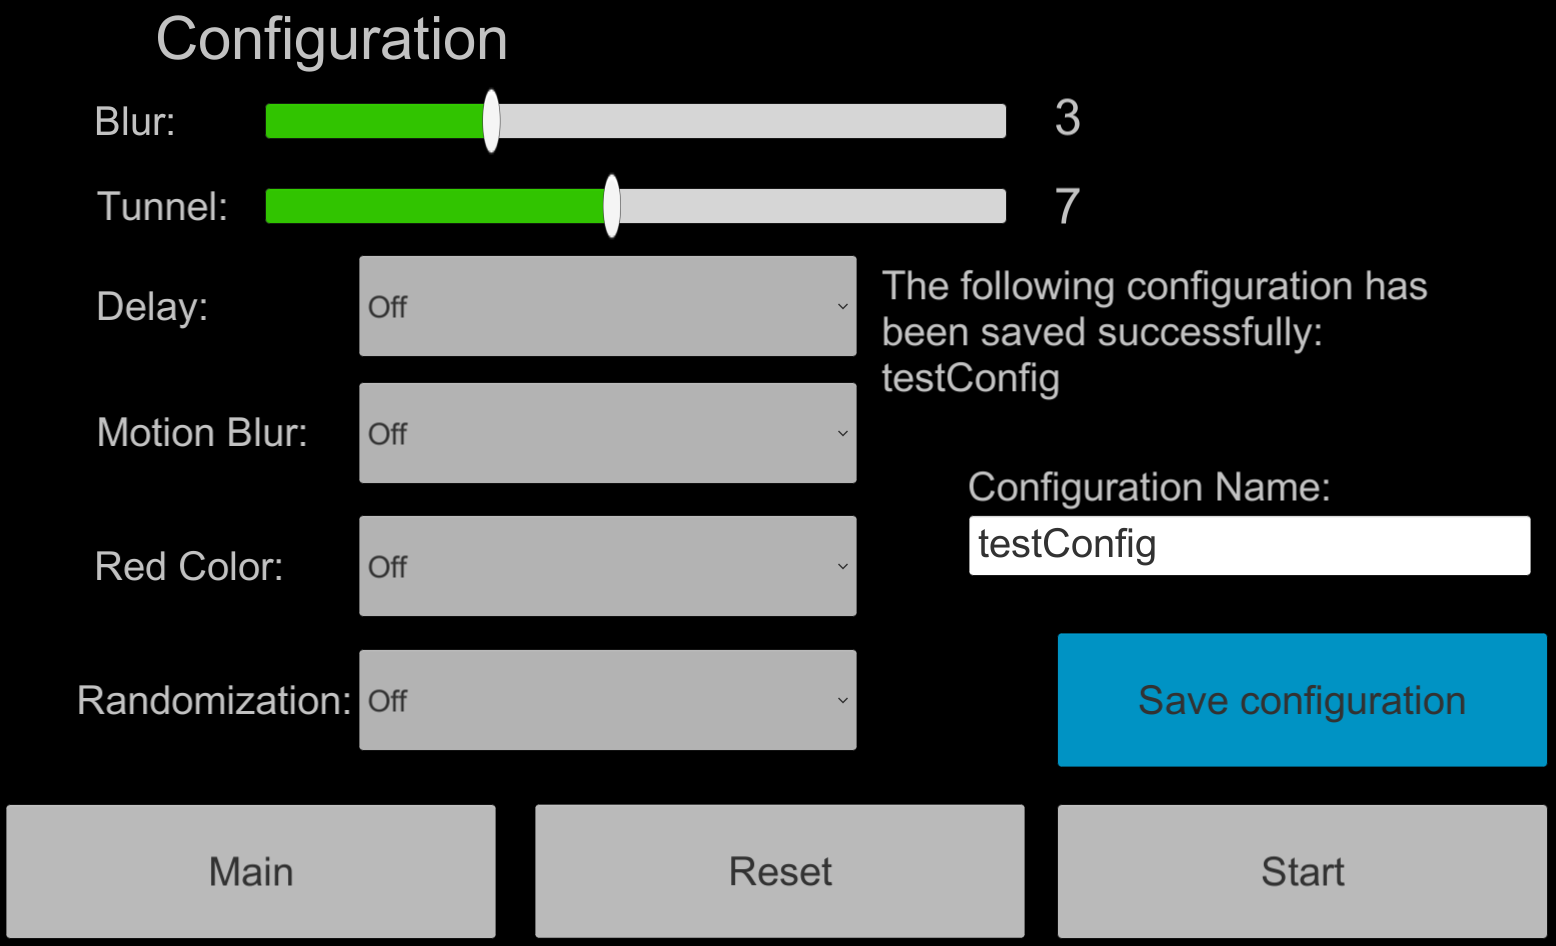
Save a custom configuration
Follow the steps described in “Create a custom configuration”. Before starting the simulation, enter your chosen name for the configuration in the field and hit the Save configuration button.
| Configuration Scene before saving | Configuration Scene after saving |
|---|---|
 |
 |
Hit the Start button in order to begin the simulation.
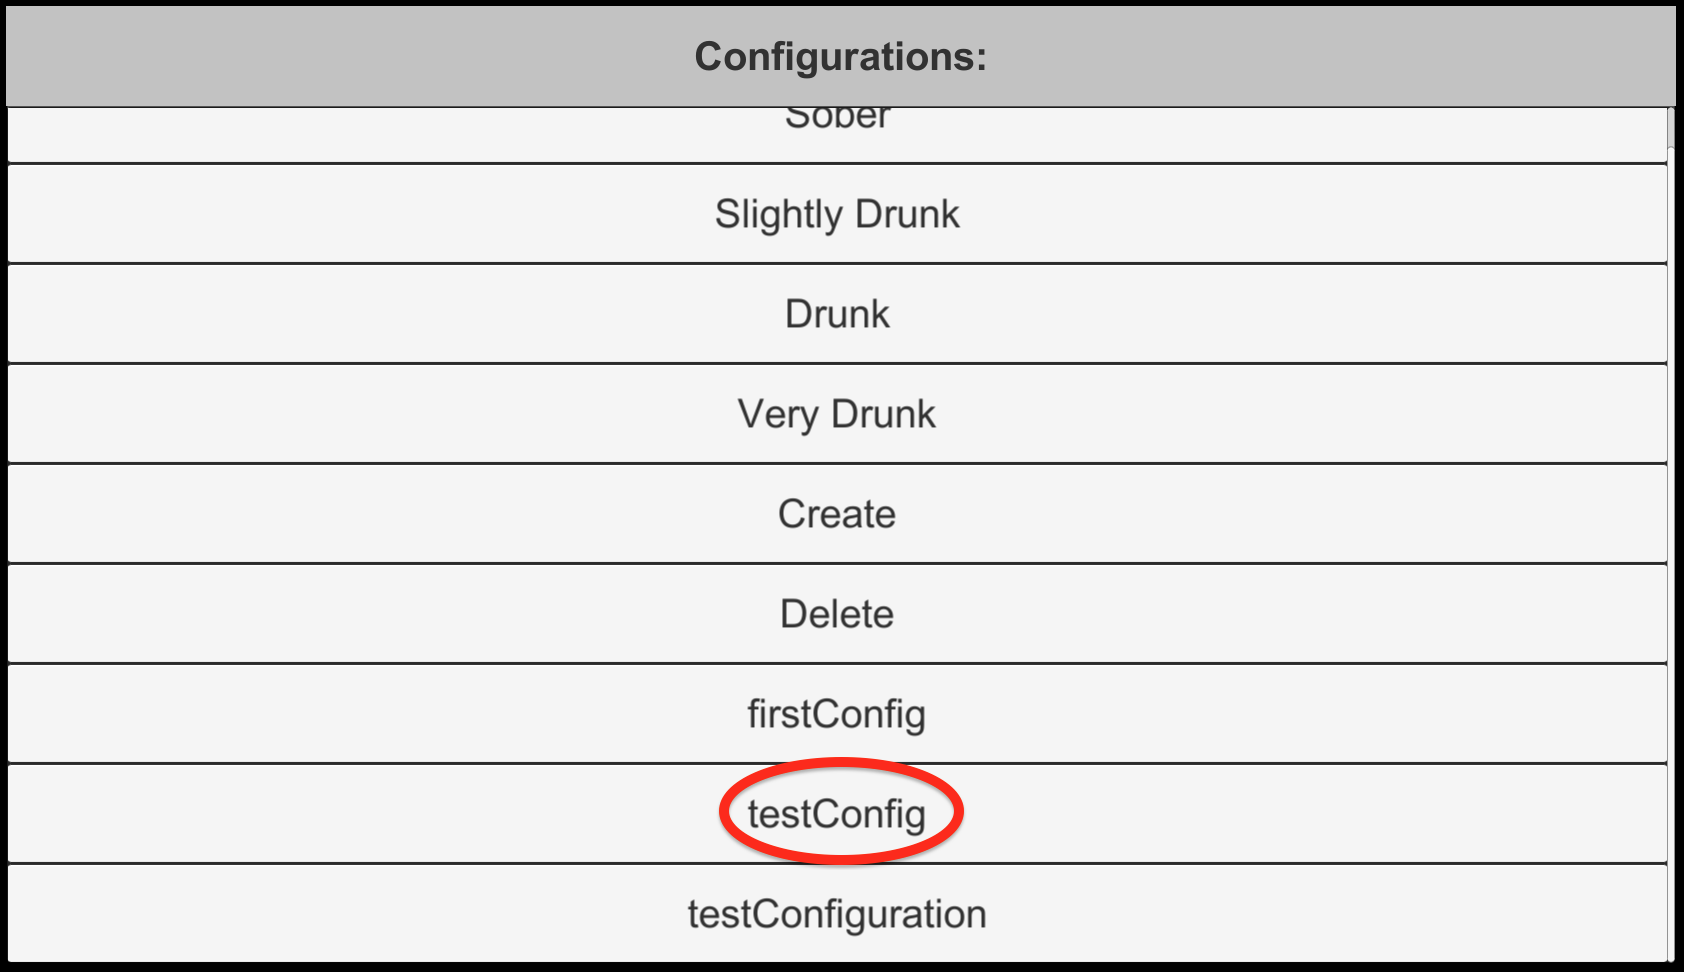
Start from a custom configuration
Similar to “Start from a default configuration”. In the Main scene scroll the list down until you find the desired custom configuration. Double-click on the item and the simulation will start.
| Start from a custom configuration |
|---|
 |
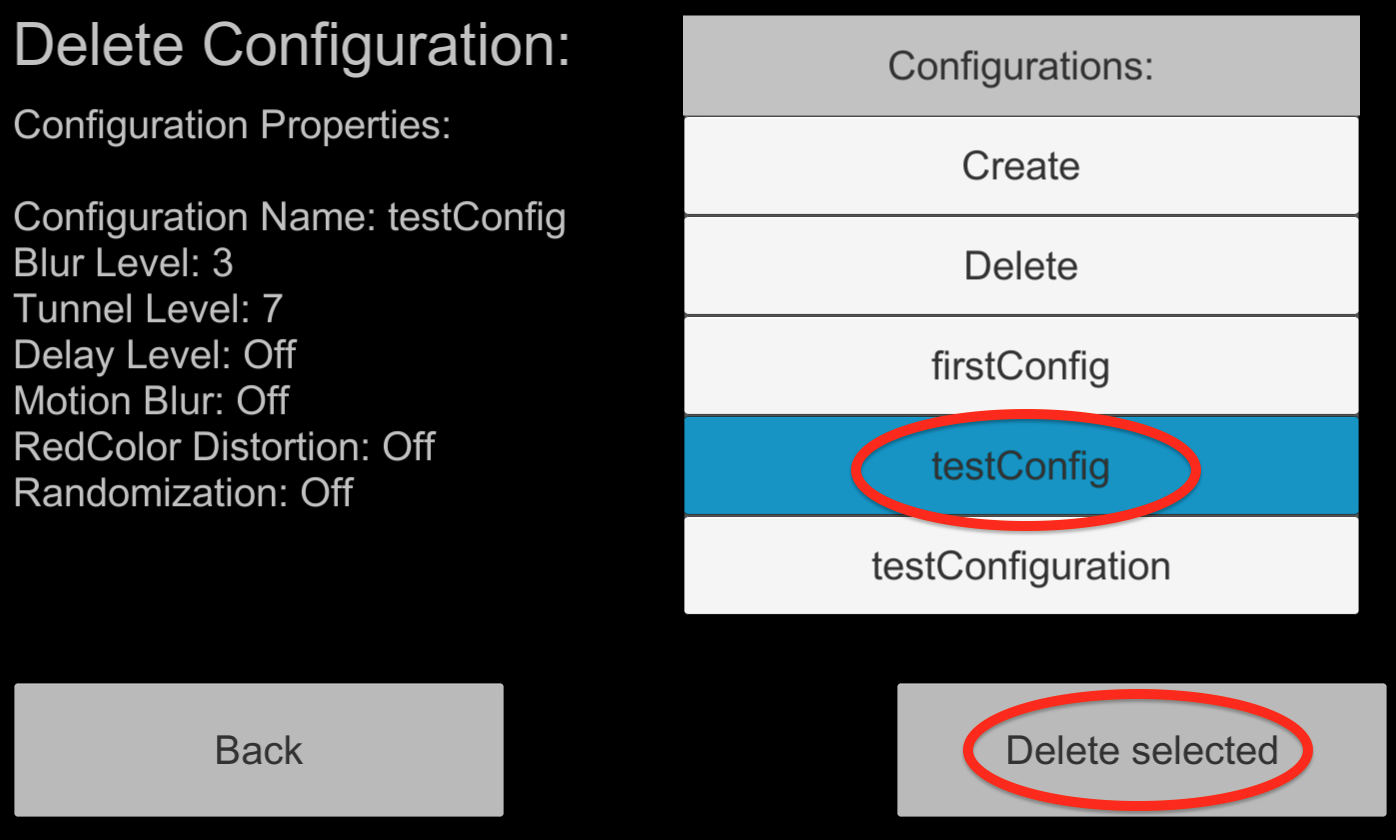
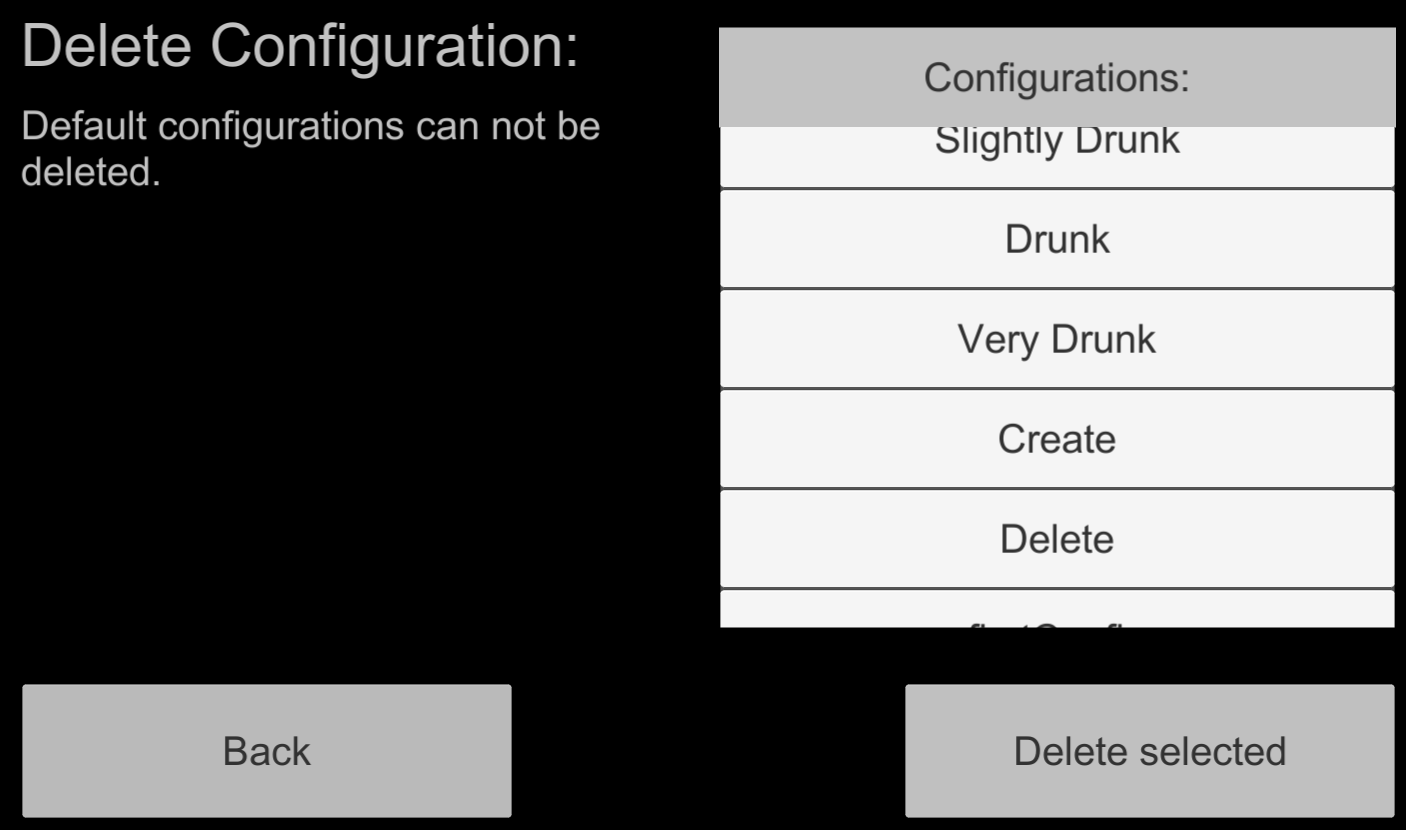
Delete a custom configuration
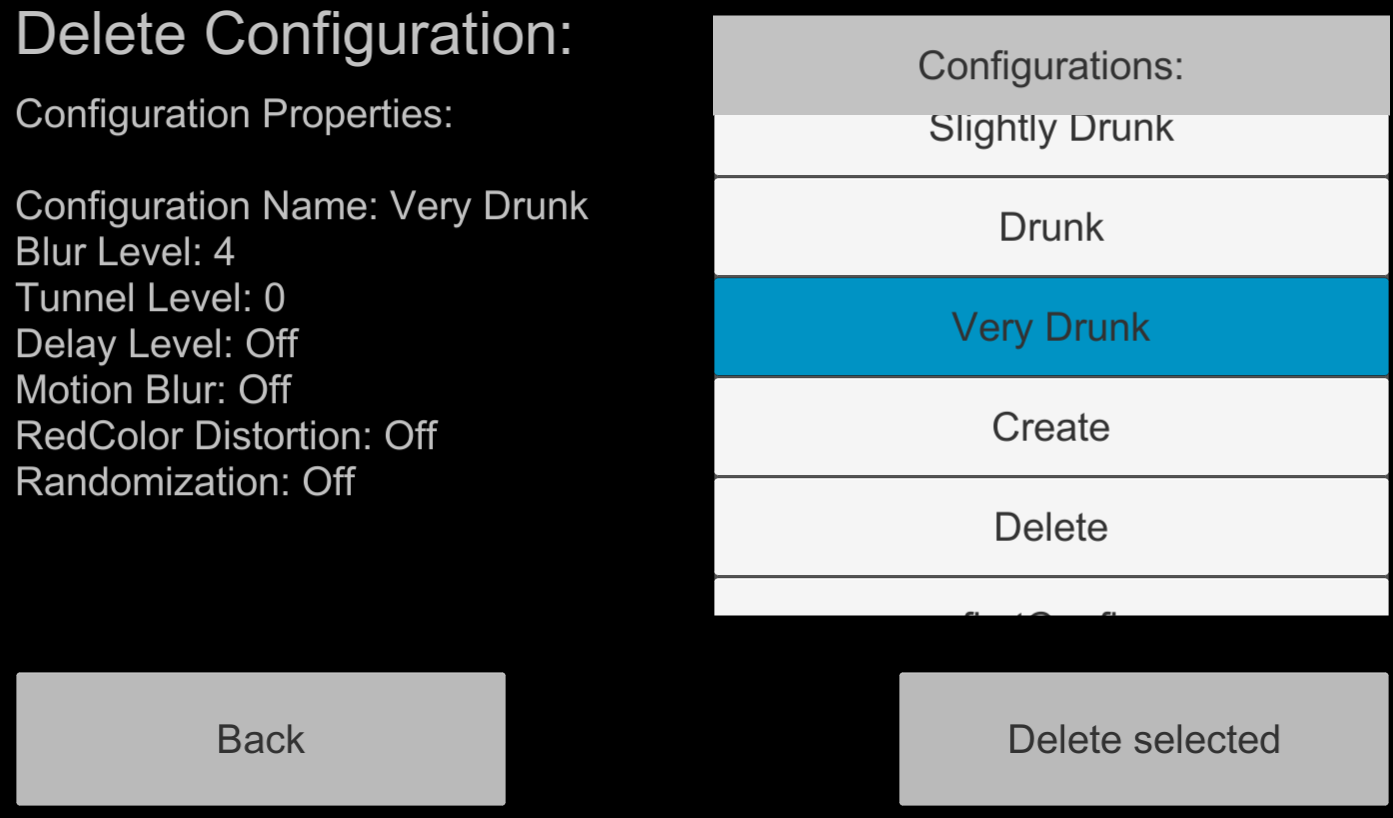
In the Main scene select Delete from the list and double-click on it. The Delete scene will be loaded. In the Delete scene you can check the values of the different configurations by tapping on the list. If you want to delete a configuration, double-click on it in the list and then hit the Delete selected button. If you choose to delete a default configuration an error message will appear.
| Delete custom configuration |
|---|
 |
| Trying to delete a default configuration | Error Message |
|---|---|
 |
 |
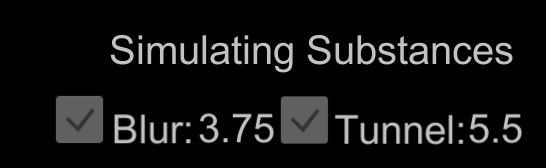
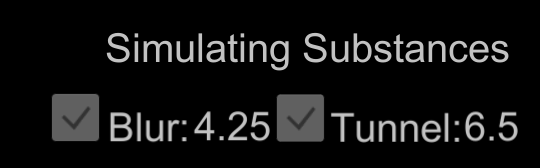
Activating the Randomization Effect
The randomization effect is a feature, which tries to imitate the inconsistency of the alcohol effects by changing the Blur and Tunnel view effects strength on the runtime after a time interval. This effect is conceived to increment or decrement this values in a progressive way, avoiding big steps wich could be very disturbing for the user. After activating this effect in the Configuration scene you can see its results in the upper part of the Simulating scene:
| Values before update | Values after update |
|---|---|
 |
 |